Hi guys,
today I’ll write a bit about terrain rendering. I didn’t find much time at all lately to work more on my engine and signed distance field rendering, but I very much enjoy writing these articles and so I dedicate this one to a different topic that is relevant to a lot of beginner devs or to people who are interested in how games work.
A lot of early 3d games simply used large geometry meshes to display their terrain, they worked more or less like any other static object in the game. But most applications that feature extensive outdoor scenery, like for example realtime strategy or open world games, rely on heightmaps to generate and simulate their terrain.
In this article I will cover the basics of how this setup works.
In the next one I will compare it to the traditional mesh approach and talk about possible hybrid solutions.
I’ll be using Unity3d terrain in this example.
Basics 101: Heightmaps
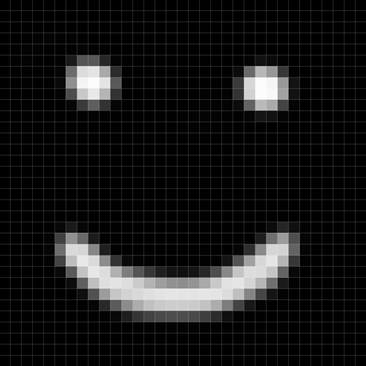
The most common way to represent terrain is a regular 2d grid of points with one height value per point (in code: float[,] fHeightmap)
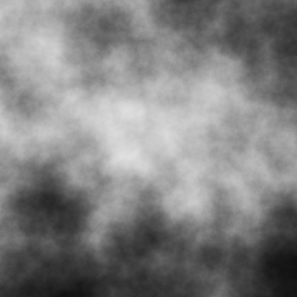
We can usually use a 2d bitmap image as the basis for our terrain.
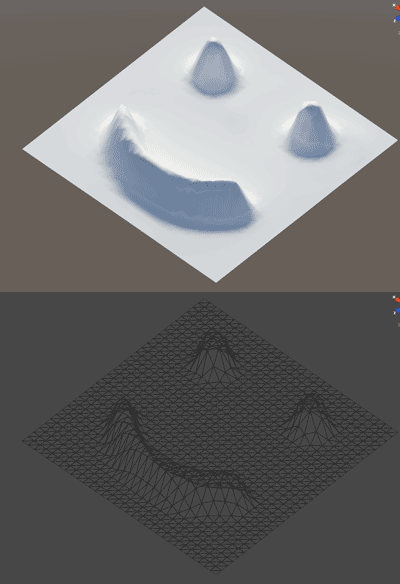
We can import this heightmap into our engine and store it as a 2d array of height values. These can then be used to create a 3d mesh, ideally we have as many vertices as entries in our array.
A good very basic tutorial about how to actually implement that from scratch can be found here:
Riemers XNA Terrain Tutorial
This heightmap can be created either manually or with the use of terrain generator tools like World Machine (Free trial, output resolution is limited to 513×513).
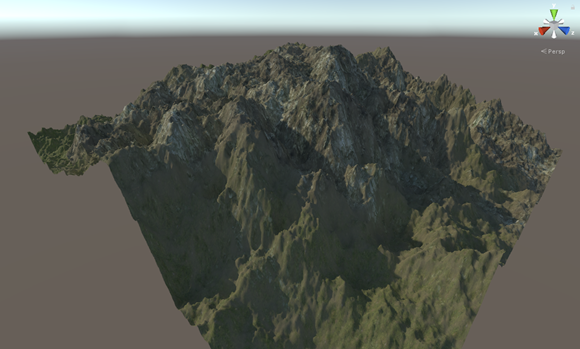
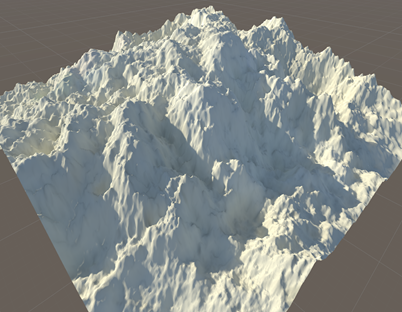
Modern game engines have all of this already implemented and we can usually generate our terrain mesh with the click of a button. Here is an example from Unity (same heightmap as above)
Usually only a part of the terrain is visible to the player / the camera, so we do not want to draw the all the polygons.
So the terrain is usually split into chunks and we evaluate for each chunk whether or not it should be drawn, instead of the complete terrain.
We can then improve performance even further if we reduce polygon count for distant chunks, and we can also cut polygons on chunks that have smooth terrain.
For example, if our terrain was a large flat plane we could get away with a lot fewer polygons without actually losing quality. For that to work it makes sense to have a cell width / height that’s a power of two, so we can always cut the triangle count in half if we want to. In our case the imported heightmap had a width of 513, which gives us a cell width of 512.
Actually implementing efficient Level Of Detail (LOD) for terrain is not trivial and is most likely going to be one of the most time consuming things when creating a new terrain system.
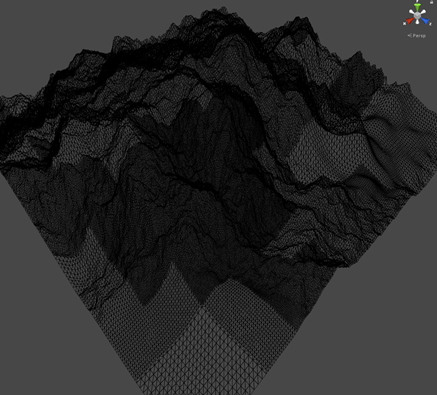
Here is an example wireframe that shows increased density with rough terrain and the separate chunks are clearly visible.
Basics 102: Texture Splatting
Then comes the issue of texturing our terrain.
Usually, for small objects, we have one texture that spans the whole mesh.
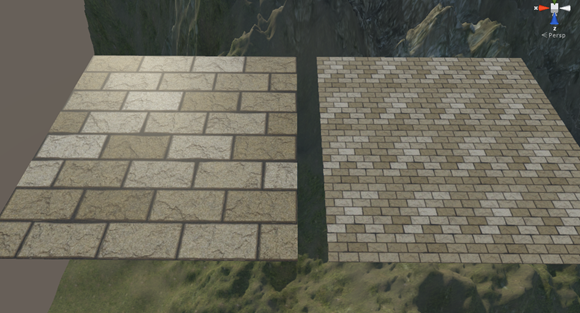
In some cases, like a brick wall for example, we can “tile” our texture and repeat its pattern several times.
With terrain it’s not really viable to have a single texture that spans all the terrain, since the texture would have to be at an insane resolution to have good pixel per surface coverage
Note: If we use “Virtual Textures” or “Megatextures” we can do just that, but it’s not a trivial thing and comes with its own set of problems.
Here is a paper from id Software about that: Virtual Textures
So the idea then is to go the second route and go with textures that are repeated over and over.
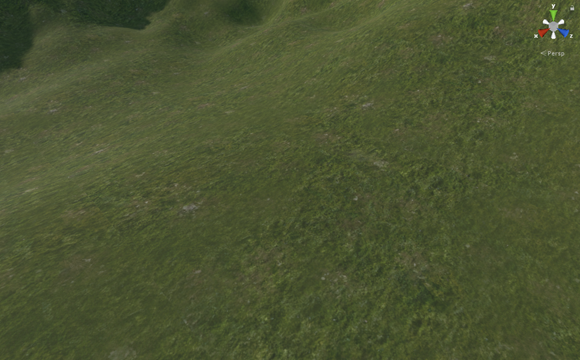
We can see this here, where a grass texture is repeated all over again. The texture chosen is pretty good because the pattern is not easily visible with this angle.
The problem with that is obviously that we need more than only one type of texture, for example rocks, cliffs, mud, grass etc.
The way we can do that is with a technique called texture splatting.
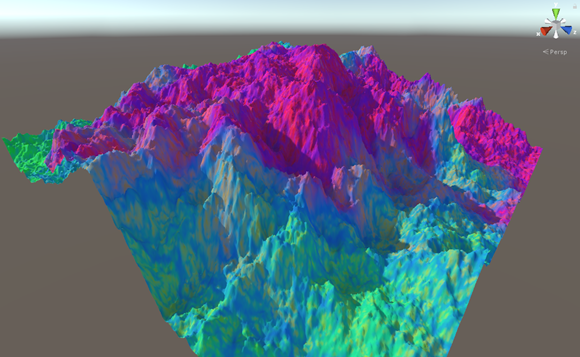
We create a texture that covers all our terrain and basically make a “map” of what surface (detail) texture to use at each position. This splatmap does not have to be very high resolution, since terrain materials changes only gradually over a moderately large area.
World machine can generate such a splatmap for us.
Note: For Unity we have to create the texture by drawing it with the built-in tools, but with the help of this plugin from Matt Gadient we can plug in splatmaps generated externally.
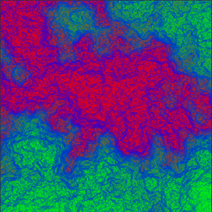 The idea is simple – every type of terrain texture gets a color channel.
An example setup could look like this:
RED – “cliff”
BLUE – “rocks”
GREEN – “grass”
ALPHA – “unused”
We can then have smooth transitions between rocks and grass. If our color is 50% blue and 50% green (which would result in cyan) we mix 50% rocks and 50% grass. A linear interpolation basically.
Note: I highly recommend this article about more advanced blending here (Gamasutra: Advanced Terrain Texture Splatting). Instead of just linearly blending between terrain textures we can use local heightmaps to achieve more believable results.
 Note: I am using Unity for this example. To look at the actual shader code you can download the default shaders here: https://unity3d.com/de/get-unity/download/archive and find the actual splatting in the “TerrainSplatmapCommon.cginc” file
You might have noticed a problem with this approach though. A texture has 4 channels – R G B and Alpha. That means that we can only have 4 different detail textures represented by our splatmap.
It’s easy to think of scenarios where we need more than 4 textures at a time though. For example we could have mud, grass, sand on the beaches, rocks, cliffs, asphalt etc. on our terrain.
We can in theory extend our basic splatmap to cover 5 instead of 4 detail textures with a simple trick: Use “no channel” as another representation.
So for example you can have RED be grass, NO CHANNEL be sand.
If our splatmap has the value of (0.3, 0, 0, 0) as a pixel value we can conclude that it has to be 30% grass and 70% (the rest) sand.
Likewise if it had a value of (0.1,0.1,0.1,0.1) then it would be a mix of 10% grass, 10% rock etc. and 60% sand.
Great, but that only helps us go from 4 to 5 different detail textures, which is still not a whole lot.
EDIT: Another problem I failed to mention – we could in theory just have a bunch of splatmaps for our single shader, which would get rid of our need to redraw the terrain.
However, OpenGL and Dx9 have pretty small limits on how many different textures we can read from in a single shader pass, as far as I am aware 16. Which really is not a whole lot.
However, if we have multiple different texture tiles combined in one texture we can get around that issue. Obviously that has its limits as well. For dx9 textures can have a maximum of 4096×4096 pixels.
For dx11 and up these limitations are a bit less harsh, but are still relevant.
Dealing with splatmap limitations
There are several primitive ways we can get around our problem.
1. We observe that we rarely need to blend between more than 4 textures at a time. For example we have cliffs and rocks on top of mountains and maybe some grass, too. In lower areas of the map we might find some sand and mud next to a beach, but no cliffs.
So we can simply split the terrain into parts so that the geometry is only ever affected by 4 textures.
This is not trivial in some cases and the artists need to know about that, too. We could end up with very fragmented terrain chunks if we make this separation procedural.
2. We draw our terrain more than once and each instance has separate splat maps. So presume we have our setup of R = “cliffs”, B = “rocks”, G = “grass” and Alpha = “mud”. If we want to add “sand” to the mix we create a new splat map and draw new terrain geometry on top of our old one. We can blend between the two terrains with alpha blending, basically make this new terrain transparent or opaque depending on how much it covers the ground.
This is the default for Unity terrain.
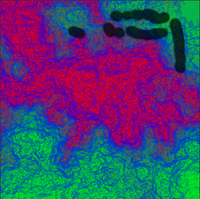
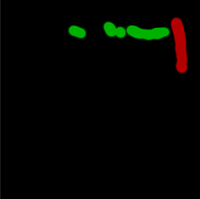
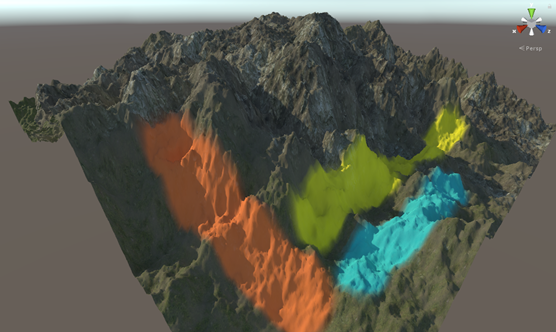
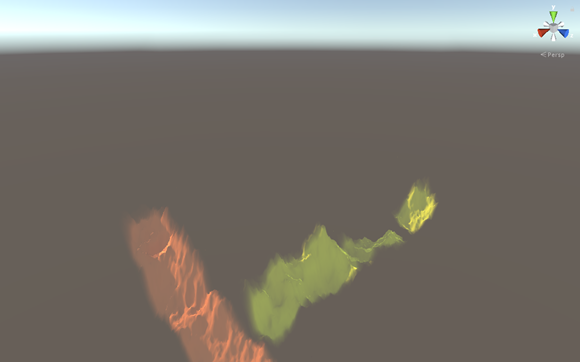
I drew some colors on my terrain to show how this works.
Below you can see the base terrain with 4 textures on top, and the other 2 textures below. We draw the “second” terrain on top of the first one to get the final result
Our two splatmaps look like this then:
The obvious downside then is that we have to draw our terrain multiple times (once for every 4 detail textures). Terrain by itself usually has a very high amount of polygons, so that’s really not optimal and should be kept in mind.
Advanced ideas for splatting
1. In theory we have 256 ^ 4 possible pixel values in a basic rgba32 texture. We can make use of that if we add some blending limitations.
For example, we could define 3 pools of textures – R G B. Each of these pool can contain 256 different textures (8 bit per channel), but they can only blend with 2 textures from the two other groups. The blend factor is then defined in the alpha value.
EDIT: Reddit user archenarecho proposes another interesting approach:
My main idea was an extension of what you describe, let me be more mathematically precise:
Suppose we have terrain R (“rocks”) mapped to the RGB value of (255,0,0) = red, similarily, we would have terrain Y on (255,255,0) = yellow, and G on (0,255,0) = green. This means we essentially defined our 3 terrains in the corners of a triangle in 2D space.
Using the eucleidian metric (or any other metric) for an N=2 dimensional space, we could determine how far a certain (x,y,0) point is from our three main corners red, green and yellow. We could now blend the three terrains’ textures using the ratios computed from the distances.
A simple example: (192,192,0), which lies roughly in the middle, yields 90 distance to Y, and 200 distance to both R and G. Thus we might want to blend the terrain at this point roughly like 50%Y + 25%R + 25%G.
I can see this being more computationally expensive, however I do not think it would be too bad. This should allow you, unless I am missing something, to create an arbitrary number of colours in the RGB space that represent terrains and blend them. Though for more terrains, it might get a bit dull.
It should be noted that using so many textures per splatmap results in the need of packing our different textures into an atlas so we do not run out of registers in our shader (I mentioned this before). We also have to use a custom algorithm for the mip mapping of this atlas texture to avoid bleeding of different textures into each other.
2. We can use a (sparse) octree structure to subdivide our splatmap in a way that each chunk only covers 4 (or 5) different textures. This can potentially result in better memory usage, too. In cases where we see large areas of a single type of ground texture we do not have to save in the highest resolution.
3: We can make the texture generation procedural. So for example, instead of having a splatmap only, we can also use information like slope to then decide the final output texture in our shader. For example on a steep slope we might choose the cliff texture, on a smooth field we choose some grass. The grass might be greener the more we face the midday sun etc.
The battlefield team has a presentation about just that: real time procedural shading & texturing techniques
A newer one about BF3 can be found here: terrain in battlefield 3
Note: Splatmaps are not great in handling a large amount of different detail textures by default. Even if we had thousands of possible channels we would soon run into problems in the shader. For performance reasons you definitely do not want to depend on a great number of different textures for any given pixel.
Alternatives?!
In the next entry / entries I will talk about what’s so great about these techniques, what’s not so great, and some awesome RTS game developer’s take on terrain ![]()
Anyways, I hope you enjoyed this short read.

A great read. When is that next article on RTSs coming out?